This guide will show you how to install Nutanix Community Edition (CE) nested in a KVM environment. While running Nutanix CE on physical hardware is preferred, being able to run it as a VM or four could prove to be invaluable to you for certain lab testing, learning, or training.
All in a completely license fee free environment!
For this guide we will use an Ubuntu desktop and a Ubuntu server (headless). You could do this entirely on a single Linux desktop or a single Linux server with a desktop environment installed if you so wish, as long as the platform you use has the hardware required. You can use whatever Linux distro you’re most comfortable with as well, but certain steps such as the bridge creation process might be different. As always, there’s more than one way to do it.
The server used in this guide has dual 8 core procs, 128GB of RAM, a single 800GB SSD in a RAID 0, and a single 1GbE NIC. It is a requirement that the CPU support Virtualization Technology which must be supported by and enabled in your BIOS. If you have an existing KVM server in your environment you can likely work with it if it meets all the requirements, but I will run through the basics of setting up a new KVM server.
Other requirements:
- You must be registered for Nutanix CE & have Nutanix CE downloaded. Get that done over on nutanix.com.
- The physical server being used must be able to communicate out to the internet over ports 80 & 443. More precisely, the Nutanix CE VMs you create must be able to use ports 80 & 443 outbound to the internet.
- All other Nutanix CE requirements apply. For those requirements, see the Getting Started with Nutanix Community Edition guide and adapt as necessary for a VM environment.
I will attempt to keep this guide mid-level. Feel free to ask questions if you can’t find the answer. Remember, Nutanix CE only has unofficial support and this guide does not change that fact.
In this guide all command line entries will include the full BASH prompt so you will be sure to know which machine you should be working on. All server command lines in this guide can be done over SSH.
Setting up the Working Environment
Install a standard Ubuntu desktop, and get it up to date. This desktop can be a VM or physical. Install Virtual Machine Manager:
|
1 |
user@desktop:~$ sudo apt install virt-manager |
Install a standard Ubuntu server with OpenSSH Server enabled, and get it up to date. From your Linux desktop SSH to the server and install KVM:
|
1 |
user@server:~$ sudo apt install qemu-kvm virtinst |
Set up a bridge for networking by editing your interfaces. If you have more than one NIC you could dedicate one to the Bridge/VMs, but in this scenario we will be using one NIC. Edit /etc/network/interfaces:
|
1 |
user@server:~$ sudo vi /etc/network/interfaces |
Edit/append to make it look similar to the below example. In this example, the NIC’s name is eno1, but you should use what your NIC’s name is, such as eth0 or em1 or whatever it happens to be. The example leaves the server/bridge as DHCP, but if you know what you’re doing you can easily set this to a static IP.
|
1 2 3 4 5 6 7 8 9 10 11 12 13 14 15 16 |
# This file describes the network interfaces available on your system # and how to activate them. For more information, see interfaces(5). source /etc/network/interfaces.d/* # The loopback network interface auto lo iface lo inet loopback # The primary network interface auto br0 iface br0 inet dhcp bridge_ports eno1 bridge_maxwait 0 bridge_fd 0 bridge_stp off |
Next we will restart the networking service with three commands chained together. Remember to replace eno1 with the name of your NIC! This might disconnect your ssh session, but if things go well it will happen quick enough you won’t even notice. If you do get disconnected, reconnect your SSH session. If you cannot reconnect, then you missed something in the previous step or in this step. Be aware that this is all one line! Your browser or this webpage might make it appear to be multiple lines!
|
1 |
user@server:~$ sudo ifconfig eno1 down ; sudo ifconfig eno1 0.0.0.0 ; sudo /etc/init.d/networking restart |
From your desktop download the latest Nutanix CE image if you haven’t already done so. SCP the Nutanix CE file from your desktop to the server where username is your username on the server:
|
1 |
user@desktop:~$ scp ce*.img.gz username@server:/home/username |
Back to the ssh session with the server, extract the ce*.img.gz that is now in your home directory on the server:
|
1 |
user@server:~$ gunzip ce*.img.gz |
Copy (don’t move) the img file into place. We copy instead of move so if we want to spin up more Nutanix CE hosts we can just copy the file again. We will rename the file to what will be the VM name as it is copied:
|
1 |
user@server:~$ sudo cp ce*.img /var/lib/libvirt/images/nutanix-ce-1.qcow2 |
Now we can create a VM with the required elements needed to run Nutanix CE nested in KVM.
Creating the Nutanix CE VM
For the rest of this guide you will be working on your Linux Desktop.
On your desktop, fire up Virtual Machine Manager (VMM). Hit File->Add Connection…

Check Connect to remote host. Change Username: to your username on the KVM server. In Hostname: type in the hostname/ip of the KVM server you set up. Hit Connect
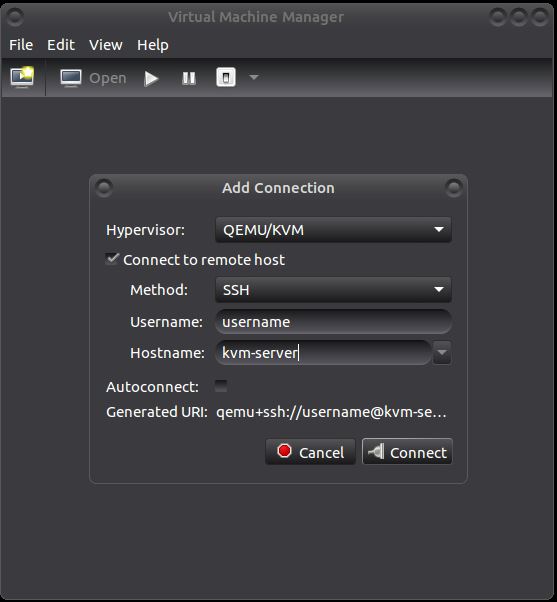
After entering your password (the same password you used to SSH to the server), you should be connected. Click the Create a new virtual machine button (that’s the button underneath the File menu)
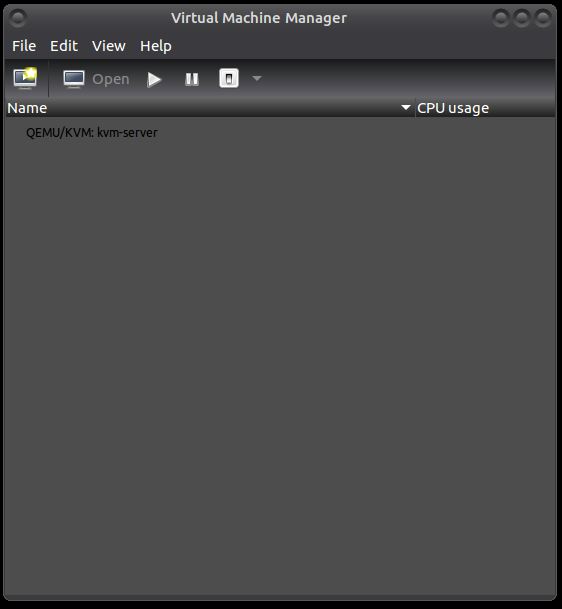
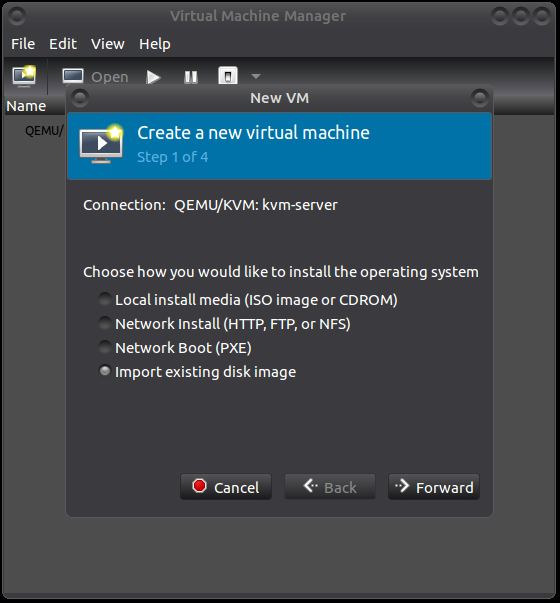
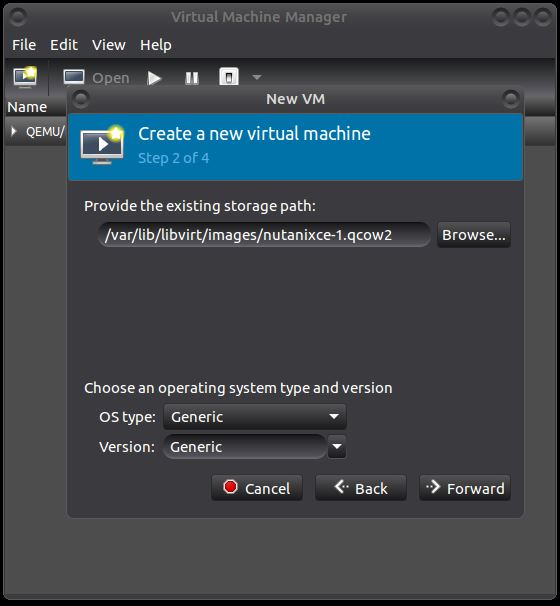
Verify that Connection: QEMU/KVM: shows the hostname/IP of the server you are working with. Select Import existing disk image. Click the Forward button.
Hit Browse…
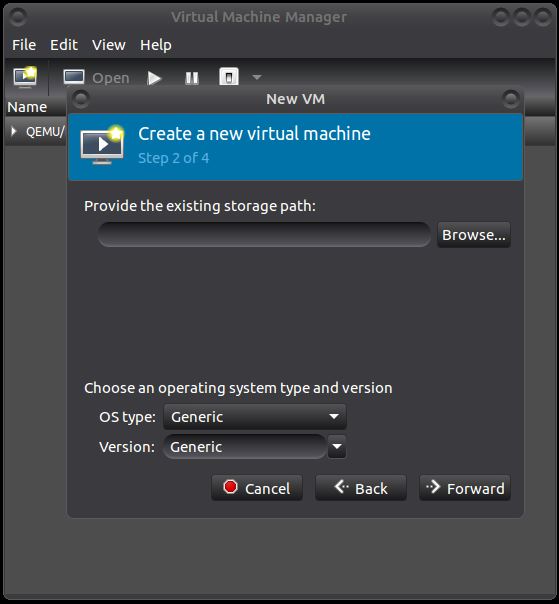
In the Choose Storage Volume window that pops up, you should see the nutanix.ce-1.qcow2 file you copied. If not, hit the refresh button next to Volumes. Select the nutanix-ce-1.qcow2 volume (or whatever you named it) and hit the Choose Volume button.

Leave the OS type: and Version: settings as generic and hit the Forward button.
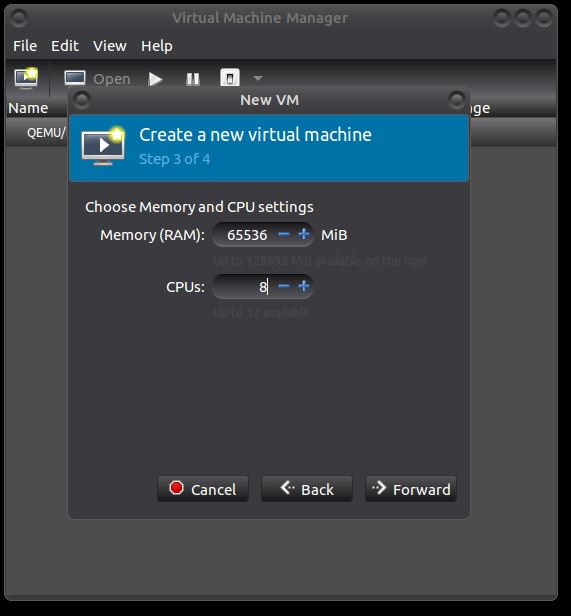
Give your VM enough memory. 16GB is the absolute minimum, but I’d recommend 24GB or greater. In my example I’m giving it 64GB of RAM since I will only be creating a single node cluster. For CPUs give it at least 4 cores, which is the minimum. More if you have them. Hit the Forward button after you’ve made your adjustments.
Change the Name: to what you wish to call your VM. Important: Check the Customize configuration before install checkbox, then hit the Finish button.

Customizing the VM prior to installation
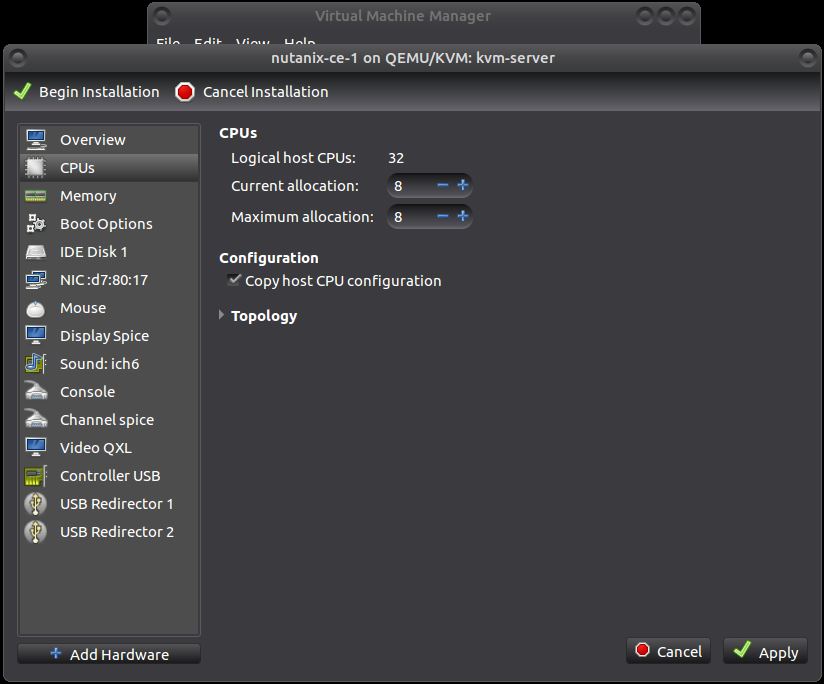
Click on CPUs and under Configuration check the Copy host CPU configuration button. This is a critical step! Not checking this will give you CPU errors such as this:
|
1 2 3 4 5 6 7 8 9 10 11 12 13 14 |
INFO: Nutanix Community Edition cannot be installed on this hardware. Reason: INFO: Traceback (most recent call last): File "./phoenix", line 63, in main minimum_reqs.checkMinimumRequirements() File "/phoenix/minimum_reqs.py", line 228, in checkMinimumRequirements checkVtx(cpuinfo) File "/phoenix/minimum_reqs.py", line 54, in checkVtx "System does not have VT-x (vmx) enabled in %s" % match.group(1)) MinimumRequirementsError: System does not have VT-x (vmx) enabled in fpu vme de pse tsc msr pae mce cx8 apic sep mtrr pge mca c mov pat pse36 clflush mmx fxsr sse sse2 syscall nx rdtscp lm constant_tsc rep_good nopl eagerfpu pni pclmulqdq ssse3 cx16 sse4_1 sse4_2 x2apic popcnt tsc_deadline_timer aes xsave avx f16c rdrand hypervisor lahf_lm arat fsgsbase smep emrs xsaveopt Installation did not succeed. Press <Enter> to return to the login prompt. |
After checking the checkbox hit the Apply button.
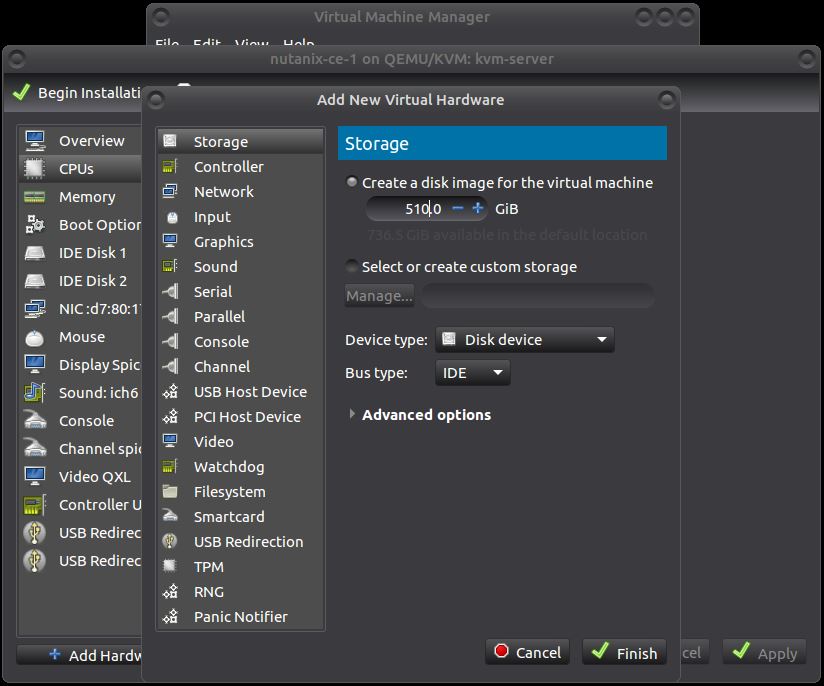
Create a virtual disk by hitting the + Add Hardware button on the bottom left. Storage will already be selected so just change the size from 20GiB to 200GiB or greater and hit the Finish button.

Create your second virtual disk by repeating the previous step, but this time make the size 500GiB or greater.
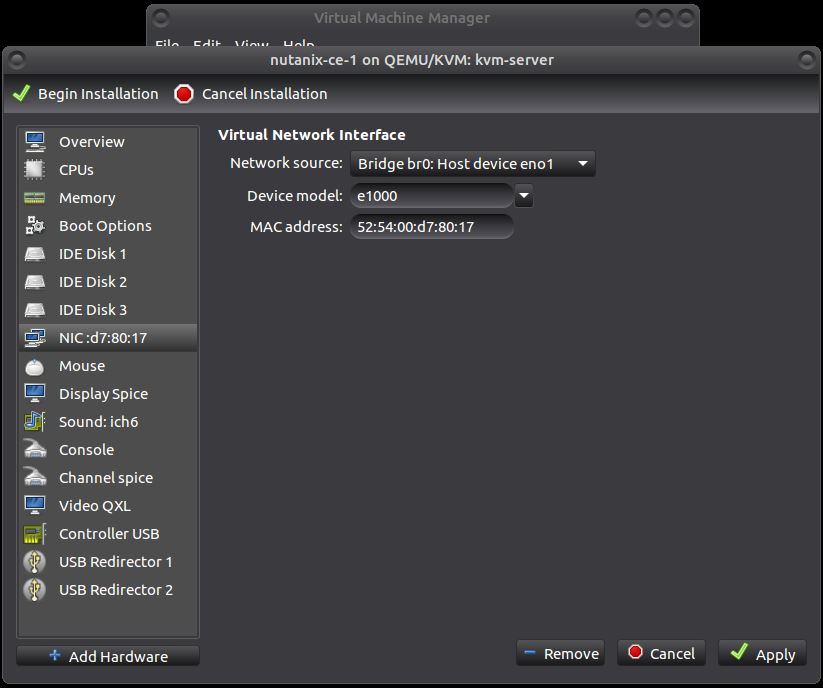
On the lefthand side select the NIC. In Network source: select the Bridge you created earlier. Change the Device model: to e1000 and hit the Apply button. Important: this step is necessary for your Nutanix CE node (and any VMs you create on it) to be able to communicate on the network via the bridge you created.
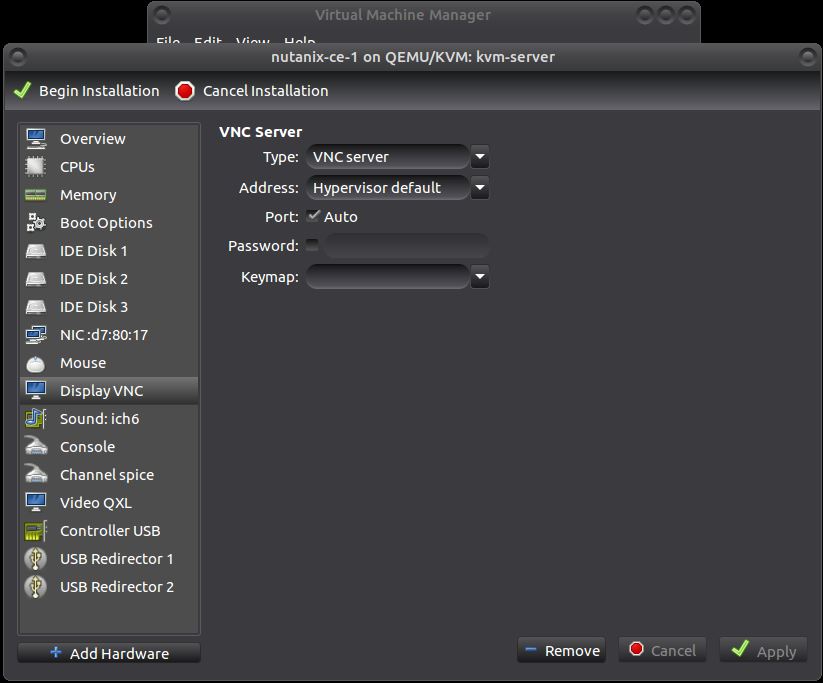
On the lefthand side select Display Spice. Change Type: to VNC server and hit the Apply button. This step may be optional for you, but I use this setting as I often nest VMs/RDP sessions and VNC plays nicer than Spice in that scenario.
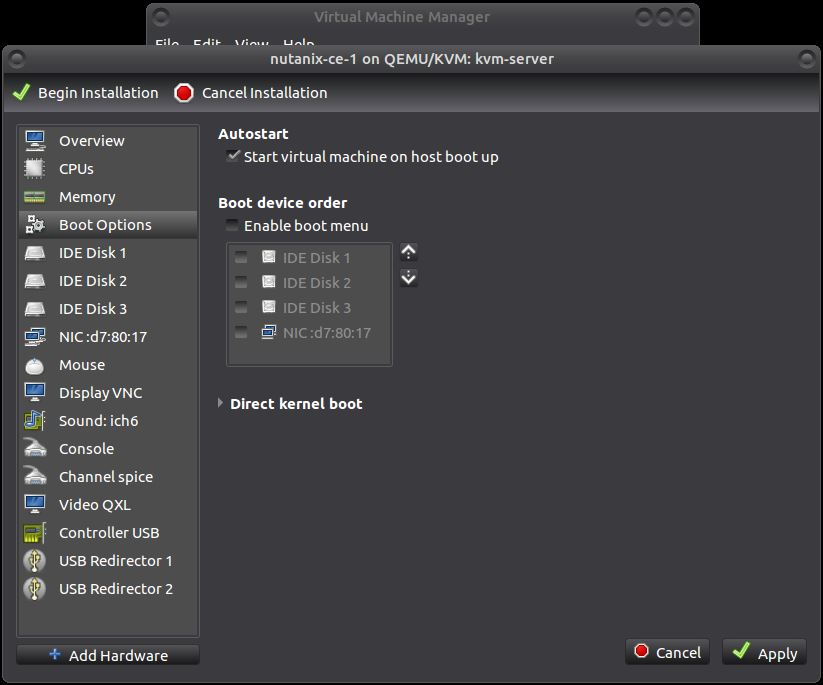
On the lefthand side select Boot Options. If you want your VM to start automatically after a physical server reboot check the Start virtual machine on host boot up checkbox. Then hit the Apply button.
Now you can hit the Begin Installation button at the top left. You will need to enter your SSH password again to see the VM’s screen.
If you followed each step above then the rest of the install process is just like any other Nutanix CE install process. I will go through it here for your convenience.
Installing Nutanix Community Edition
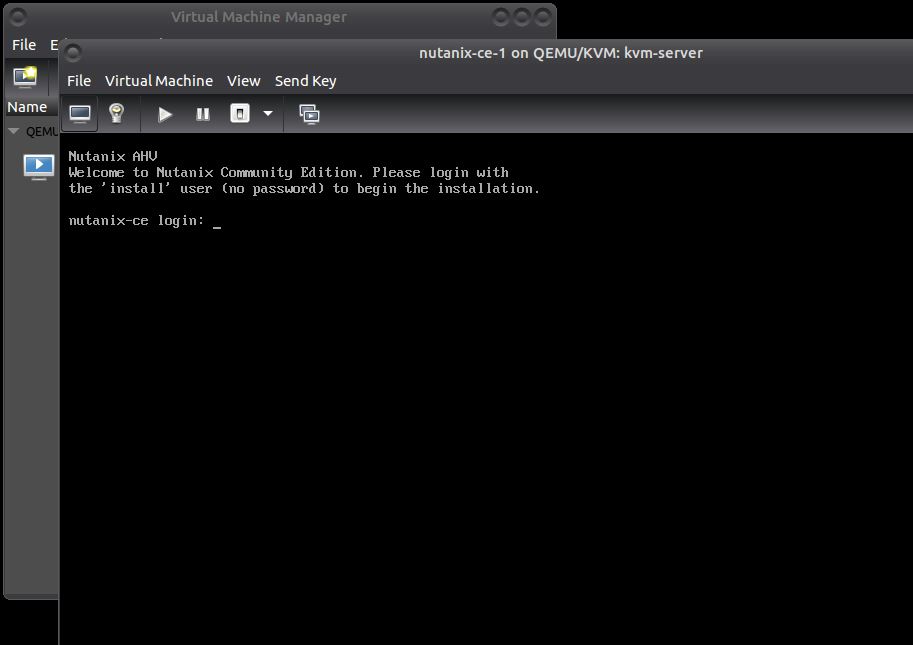
Picking up where we left off your screen should look like the following image. Type install as directed to begin installing.
Choose your keyboard layout and select Proceed.

Verify the virtual disks show up in the Disks list and select Proceed.

The installer will run some tests to make sure your disks are sufficient enough to run CE.

Now you will need to either enter static IP addresses (recommended) for your Host and CVM, or leave them blank for DHCP (not world ending, but can make things difficult). If you are only using one node, select the Create single-node cluster checkbox. Leave that unchecked if you are creating 3 or 4 nodes in which case you will create the cluster manually. Make sure you put in a DNS Server address. Scroll to the end of the EULA, hit the I accept… checkbox, then hit Start.

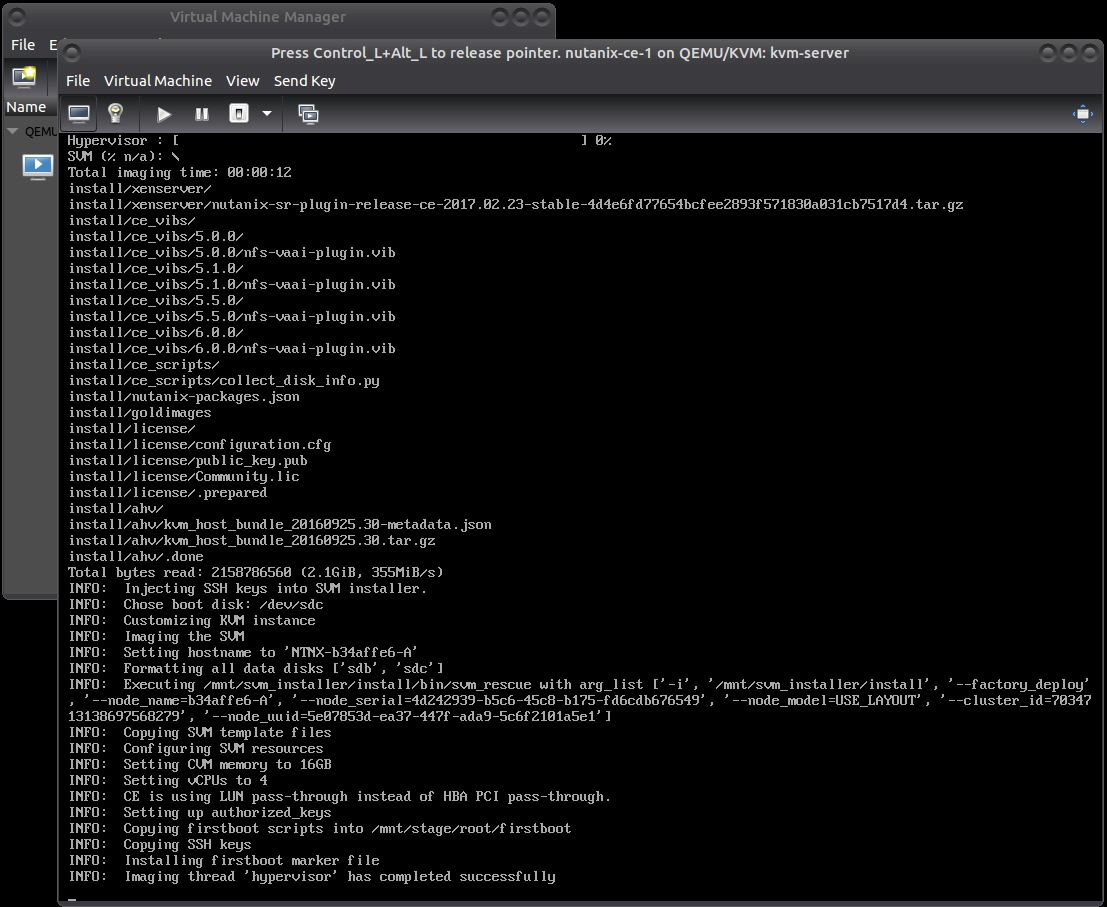
The install will run for a few minutes.
When finished you will see the Success message.
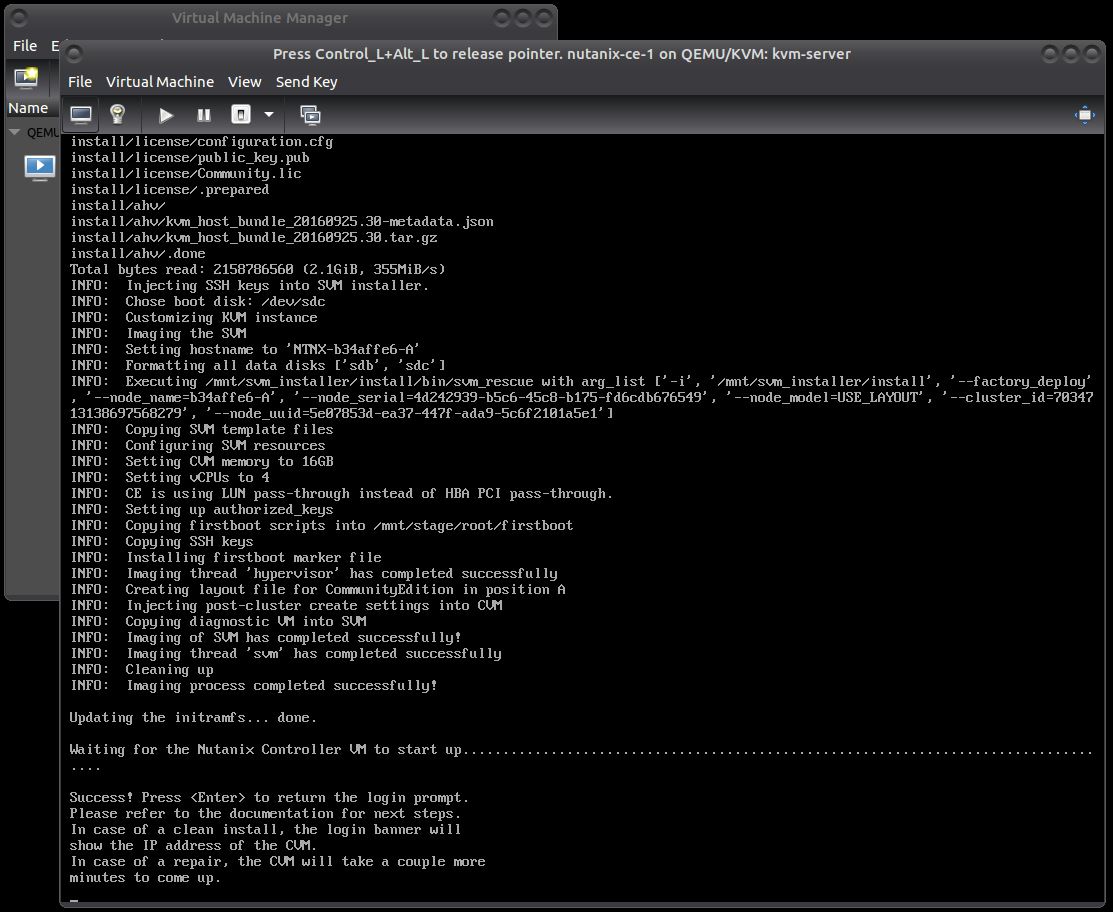
After hitting
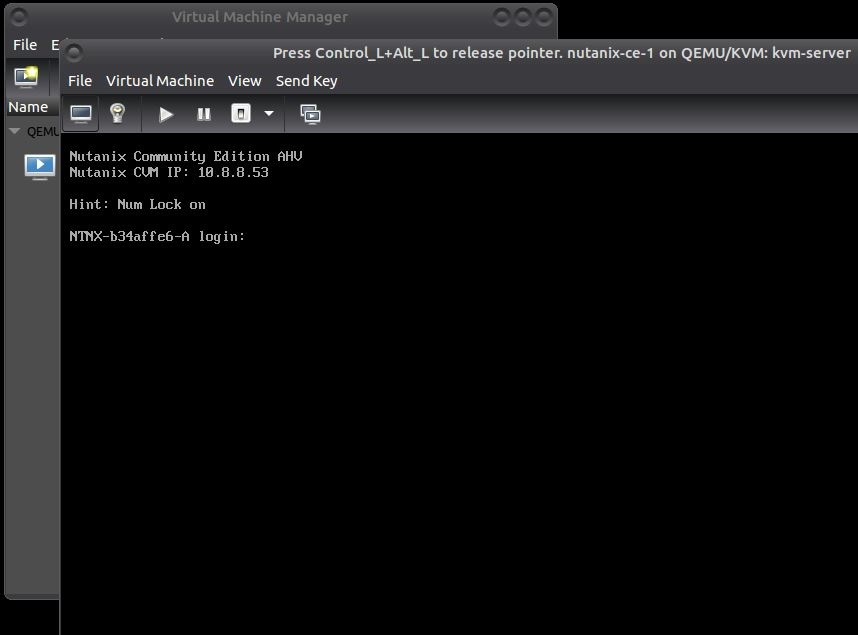
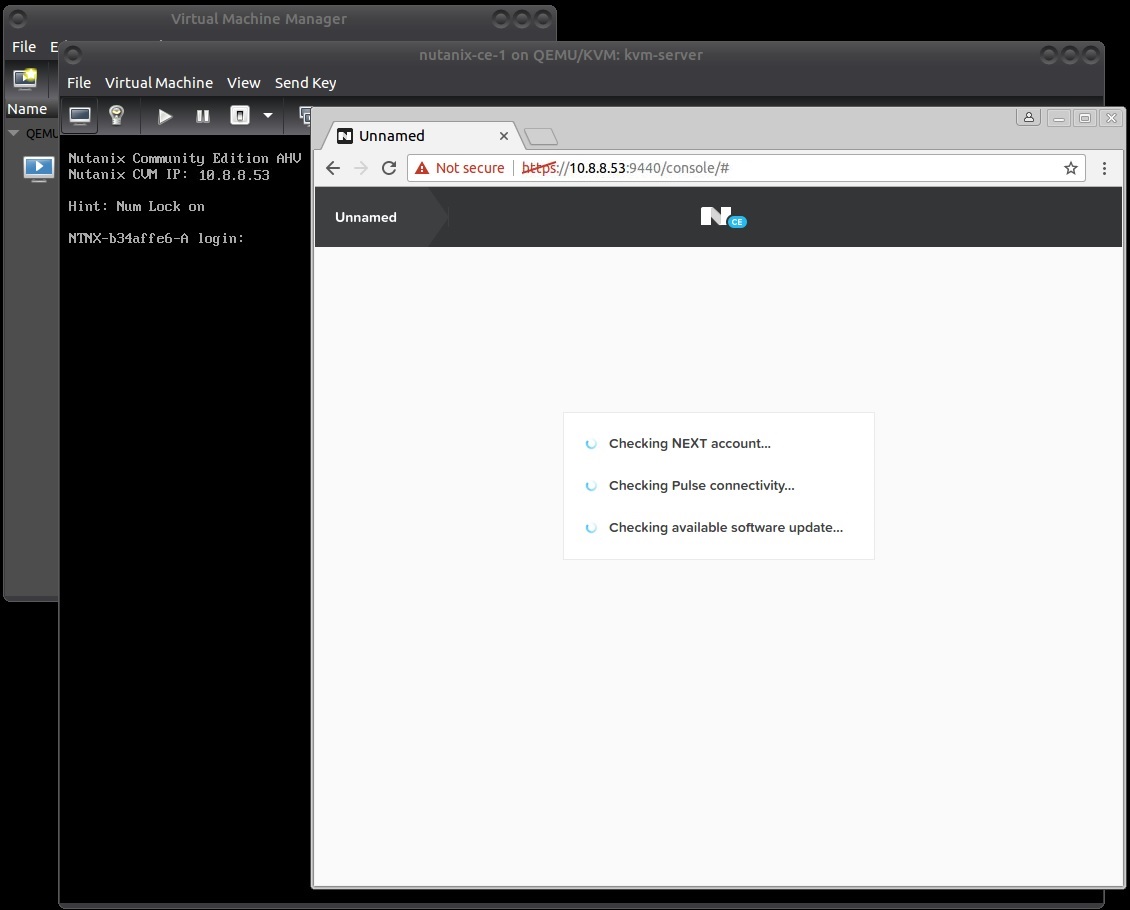
If all went well, you should be able to open a web browser, type in the IP of the CVM, accept/pass through the cert, and Prism Element should be started.
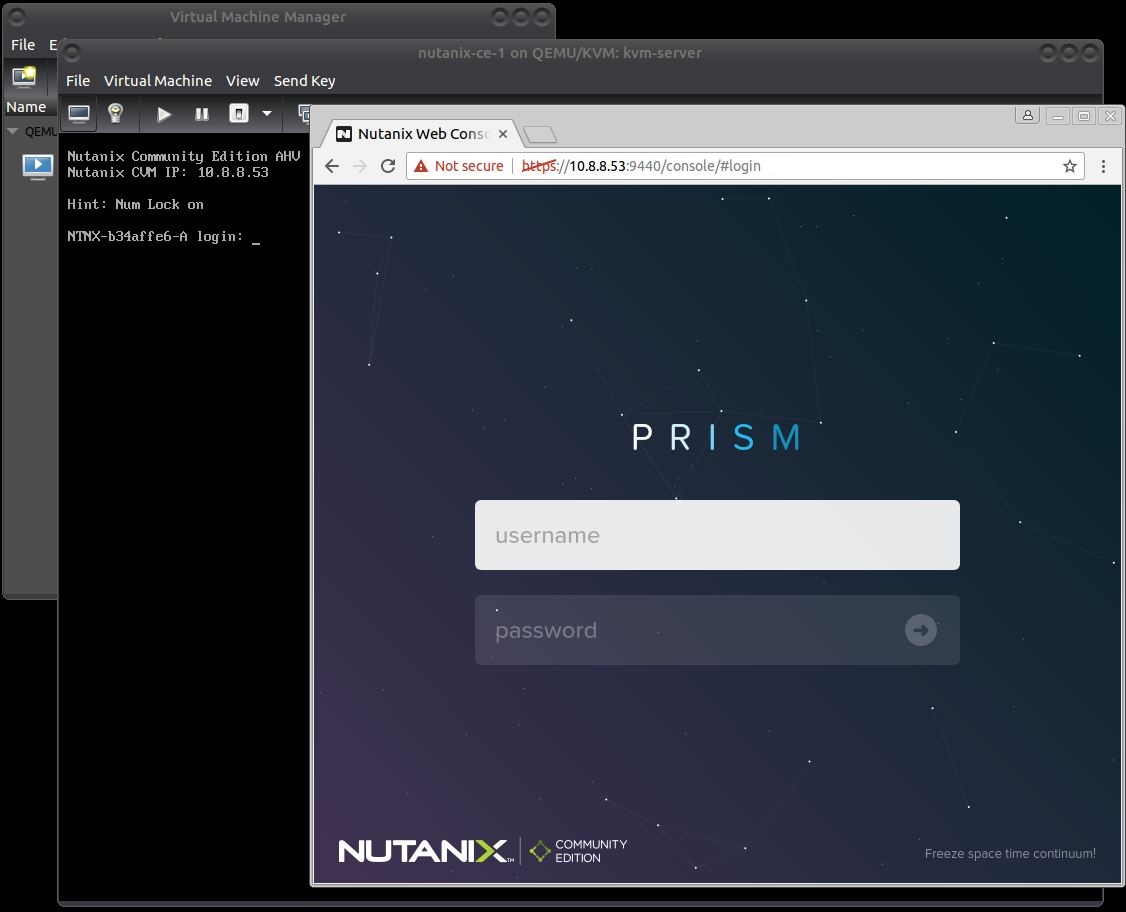
After logging in with the default admin/admin credentials, and changing the admin password, you will be required to enter your NEXT credentials. This is the email/password you used to register for and download Nutanix CE. After entering your credentials, it will verify them.
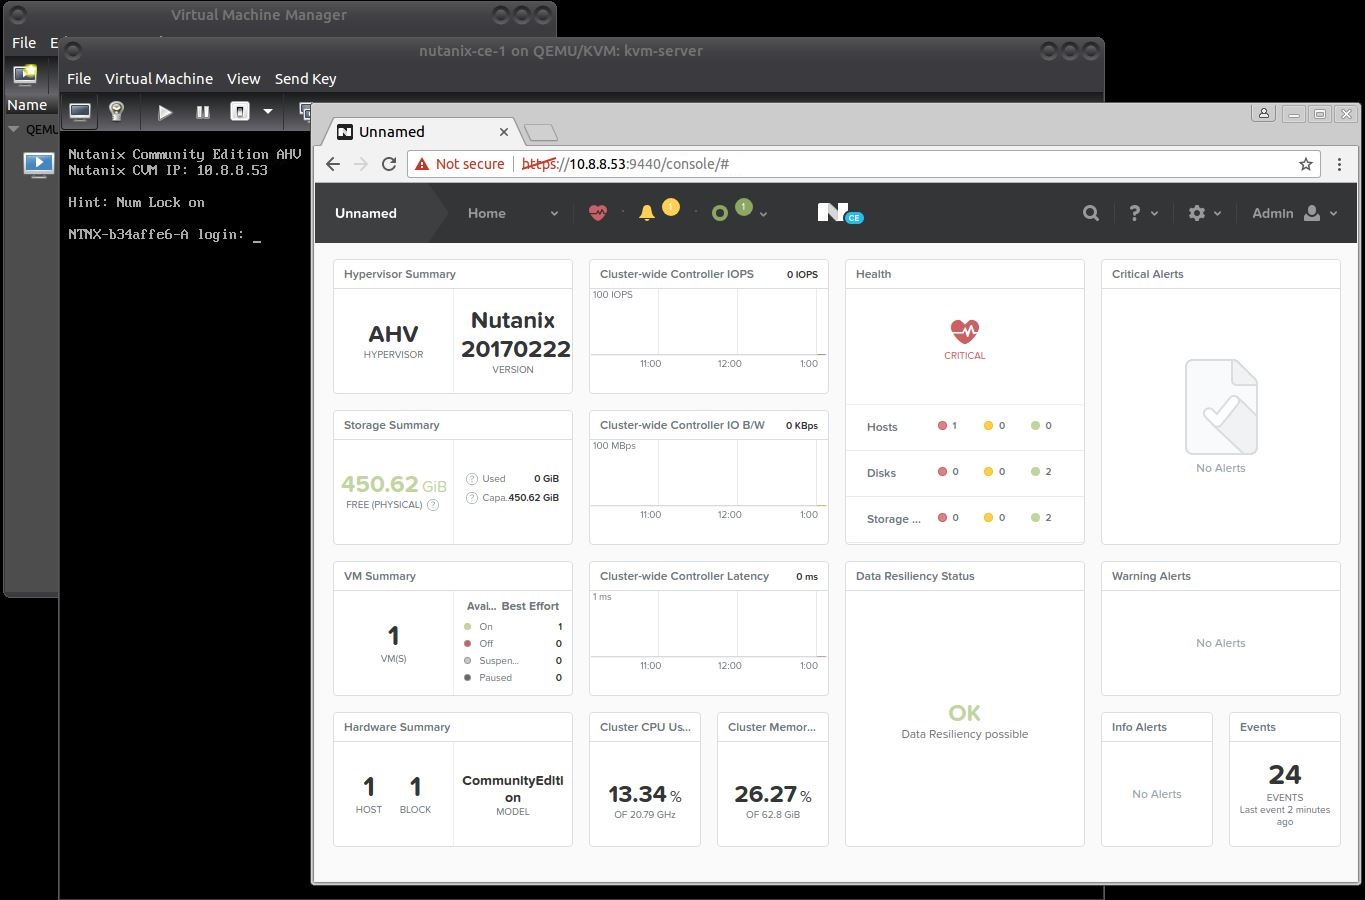
You should now be logged in to Prism Element. You can use it like any other Nutanix CE node, including creating VMs that can communicate on the network.
Great post. I would add only the following when selecting the CPU on some distributions such as CentOS, the Nested Virtualization is not enabled per default, thus you would need to do the following:
[root @ block2 ~] # vi /etc/modprobe.d/kvm-nested.conf
Optionen kvm-intel verschachtelt = 1
Optionen kvm-intel enable_shadow_vmcs = 1
Optionen kvm-intel enable_apicv = 1
Optionen kvm-intel ept = 1
modprobe -r kvm_intel
modprobe -a kvm_intel